
a very cute reason to abandon my garden blog for a year
a very cute reason to abandon my garden blog for a year
this is our composting toilet. the toilet itself is a fancy one with everything bought and made out of shiny new plastic. of course we could have built one ourselves a lot cheaper. but we are the first ones in our garden community to have a composting toilet. we are located drinking water catchment area and had to get special permission to have a toilet without a waste water tank. so it had to be something reassuring looking with printed instructions to come with it. we also could not afford the risk of anything smelling because a bad example would put people off composting toilets all together.
 so we bought a blinking new wind-operated ventilator to sit on top of the ventilation pipe. it starts turning at the slightest bit of wind and works a treat. we put the toilet in a very quiet corner in the garden and now have a fancy toilet without a house to go with it. at some point I thought a bit more privacy would be nice. so last winter a made a frame from willow branches (we grow five willows that get all their branches chopped every year).
 in spring I bought a big bag of compost. the plastic bag covers the lid of the excess liquid drain container of the toilet, which is dug in the ground and needs to be emptied about once a year. I then planted some seeds and got very nervous when slugs seemed to eat my seedlings quicker then they were growing.
 with he they help of some sharp eggshell sprinkles around the bases they made it in the end.
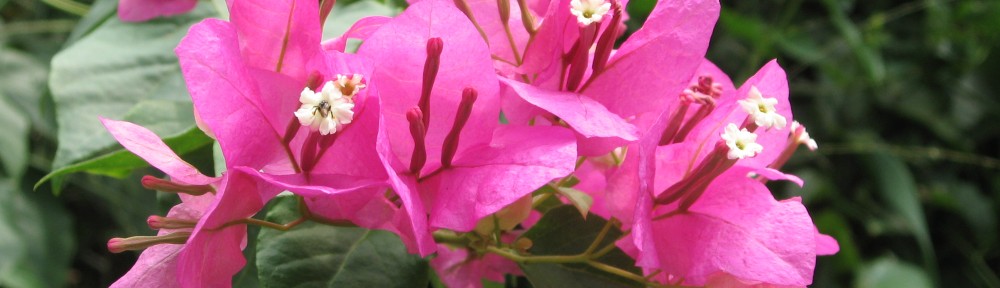
 a bit of morning glory to the left. a few scarlet runner beans on the right.

 we have a very romantic sleeping beautie’s hedge now.

at this time of the year many first crops have finished so it is a good time to plant a second one or improve your garden soil by sowing some green manure. this is what my second post on organic fertilizing is going to be about: you plant a crop that you are not directly interested in harvesting but work the plant material into the soil instead. this will help you to improve the nutrient status and health of your soil. here are a few reasons why:
green manure adds a lot of organic matter to the soil, which means food for soil organisms (see some principles on organic fertilizing in my previous post) and improves the physical structure i.e water holding capacity.
green manure covers the soil and prevents it from drying out, rain will not wash it away, the sun will not bake it until it cracks.
the plant roots of the cover crop can break up and air very heavy and compacted soils.
green manure plants temporary store nutrients from the soil in their plant bodies which then can not be washed away.
they also add nutrients as they produce carbohydrates from sunlight and CO2 from the air. they exude some of the carbohydrates through the root while growing and all of them will be available to the soil organisms when the plant dies.
legumes add extra nitrogen to the soil, as they associate with nitrogen-fixing bacteria that convert nitrogen from the air into organic nitrogen compounds that plants can use.
green manure plants with deep roots can accumulate nutrients from lower areas of the soil and make them available to the top layers again.
a crop rotation that includes green manure is more varied and can prevent soil exhaustion.
if flowering, green manure plants attract pollinators
 here is a quick introduction to my favourite green manure plant this year:
Lacy Phacelia (Phacelia tanacetifolia).
it is not related to any of the gardening crop plants, is quick to grow, pretty to look at and improves the soil. It is a beautiful long flowering plant and it keeps for a long time when cut for a flower bouquet. We plant it underneath our gooseberry and currant bushes. we also plant it on beds that seem exhausted or simply on areas we don´t have time or energy to plant something else. it keeps the weeds down and the space pretty and the bees simply love it.

when me and my friends took over our garden plot 6 years ago, the soil was in a terrible state. it was whitish grey sand with hardly any organic substance and would repel water. getting and keeping this gardens soil fertile and healthy has been an ongoing task for us, as it is for all organic gardeners. back then, the plants had gotten used to rely on mineral fertilization and there was no organic matter, no soil life that could provide the nutrients in the ground. the first year we had smallish, yellowish-red plants that looked terribly hungry. the only exemptions were tomatoes and courgettes that did not mind almost fresh manure. conventional gardening/farming relies on feeding the plants directly (which we stopped doing). organic farming relies on mainly feeding the soil organisms, by adding organic material in form of compost manure and mulch, which then in turn provide nutrients for the plants as well as improve the structure of the soil. we are working towards a dark, crumbly soil which retains nutrients and water and is warm and airy enough for plant roots to thrive. it is a long-term project. a very rewarding one. I find this topic so interesting that this is going to be the first post of a series on fertilizing in organic gardenens.
 when adding material of any sort to improve the soil there are a few general things I like to think about.
these questions reveal that peat for example is not a good choice of potting mix where I live. It comes either from one of the very few bogs that are left in central europe and are an immensely valuable habitat for now rare plants and animals. or it gets quarried large-scale in the south of Russia, with the same habitat loss and the loss of an enormous carbon sink. the drying up of wetlands to quarry peat on large-scale lead to 700 bushfires in the hot summer of 2010 were 180000 ha of dry peat were on fire. peat grows only 1mm a year so it takes a long time to grow back.
home composting on the other hand answers a lot of the above questions satisfactory (check out some composting ideas) . getting local material generally ensures that you know the answers to the above questions in the first place.
but even in a well mulched and composted garden there is need for some quick acting (i.e. water soluble) fertilizer. a lot of our garden plants demand a high amount of nutrients and profit from liquid fertilization on top of a good layer of compost during the main growing season.
here is my recipe for nettle and comfrey tea which makes an excellent liquid fertilizer.
 fill a bucket with:
the fertilizer is ready when it stopped foaming and only the plant stalks are left in the mix. this is highly concentrated fertilizer which needs to be diluted! high nutrient demanding plants (cucumbers, squash, pumpkin, tomatoes, capsicum, potatoes, corn etc.) get fed 1 part fertilizer on 10 parts water. other vegetables and flowers get a dilution of 1 part fertilizer on 20 parts of water. our tomatoes and roses simply love the mix.

I had seen ladybirds on my broadbeans and was hoping they would multiply faster than the aphids. this was of course wishful thinking. nothing multiplies faster than aphids under the right conditions. they have mastered the art of asexual reproduction and don´t even need to mate to produce offspring. overwintering eggs hatch female aphids which produce hundreds of clones. however my hopes were not completely unfounded. I spotted quite a few clusters of tiny yellow lady bird eggs carefully stuck under the leaves.

I did get impatient though, when in a very short amount of time a considerable part of my bean plants, stalks , leaves, flowers and all, were covered in black flies. something had to be done. I got the hose out. black flies really don´t like cold water. I hosed each plant individually (carefully, the leaves squish easily), removing the aphids carefully with my fingers. you never get all of them, but apart from me being dripping wet, there were considerably less after my hose treatment. the sugary juice of all the aphids makes the leaves sticky and attracts fungal growth on the plant. the water washes the sugar away and cleans the plants as well as removing the insects. I had checked for lady bird eggs beforehand and tried to avoid the leaves they were attached to. I hosed the plants twice so far and finally some help has arrived. the ladybird larvae have hatched:
 they have a massive appetite and I counted at least 30 of them. in the picture below you can see them working away on the first beans to emerge.
had I used an insecticide, my little helpers would not have had a chance. being a scientist I of course have some science to back this up. a couple of guys did some mathematical modelling in 1925 concerning the population dynamics of prey/predator systems (Lotka and Volterra). in our case the aphids are prey, as they get eaten by the ladybird and ladybird larvae predators. they found, that when both prey and predator get equally disturbed (if you want to call poisoning them with insecticide a disturbance), the prey will always recover faster. the predator population (ladybirds) might completely collapse as it suffers twice. they get poisoned themselves, and any survivors die by a lack of food, as their food source got poisoned as well. the aphids however will recover quickly and multiply unchecked by their natural enemies.
my wait-and-hose-method is a bit more selective as the ladybirds move out of harms way and I tried to avoid their eggs. they did a good job so far and hopefully are going to keep the aphid population low for the rest of the season for free.
it all began in february. it was freezing -10°C cold and there was no way anything could be planted in the garden soon. as broadbeans need to be started as early as possible (in milder climates you plant them in autumn, ideal temperature for germination 5-10°C) I planted mine in milk cartons on the windowsill. when the frost was over and the ground had thawed and warmed up a bit in march, I already had little bean plants to plant out. this is what my broadbeans looked like on the first of april:
 you can see what our soil is like. if exposed the grey sand turns into a white sandpit that repells water. together with the amount of rain we are getting at the moment (3-5mm every two weeks or so) it starts to remind me of desert farming. hence the mulch and the black drip irrigation pipe on the picture below.
 now, five weeks later in may, the beans have trippled in size and are putting out crazy amounts of flowers.
 but nothing is perfect. the imperfectness in this case arrived in form of black bean aphids also known as blackfly. they are the reasons why broad beans need to be planted out early. the beans don´t mind cool weather the aphids do. luckily the garden police has spotted the problem and I have seen several lady birds on patrol already. this yellow and black cutie is munching away on an aphid.
go ladybird go!
 one adult ladybird can eat up to 50 aphids a day, but this is nothing compared to the appetite the larvae develop. so I hope for the first eggs to hatch soon and keep the nasty flies in check. this beeing real life the situation is a bit more complex though. this little fellow:
 is resting after beeing attacked by three ants. the ants milk the aphids for sugary juice, cary them from plant to plant and as I saw, even defend them agains ladybirds. angry ants are to be recond with, especially when you are bug sized. they can not be everywere though and the ladybirds can fly.
I´ll keep you posted who wins.
here are some pictures from early april. the garden has changed dramatically since then, as we had temperatures up to 30°C. I will write about this whenever the spring planting is finished. at the moment I am busier with gardening than with blogging about gardening.
I can never resist to buy some primroses in early spring. they get planted out afterwards so we have more of them in the garden every year.
 the following flowers all came from a special offer “surprise box” of flower bulbs that my friend got for 5€. we planted them out and never knew what they were until half a year later.


bluegrape hyacinths are my favourites. they look like little bells with cute little white ribbons. daffodils are classic. the primroses with a high stem are nice for a spring bouquet of flowers. but the hyacinths need to be planted in groups. they look a bit lonely by themselves.
every year in january I start collecting milk and juice cartons. I put a big sign on the fridge for my housemates so they remember. the top gets cut of so they rinse and dry well. check out my little collection on the bookshelf: Initially I start my seedlings in a plastic container that has holes in the bottom (vegetables and mushrooms get sold in these) and use very light soil for good drainage. as a rule of thumb the seeds get planted twice their width deep into the soil. exceptions are plants that require light for germination (i.e Basil seeds) they get placed on top of the subtrate. l always label the containers with plant name and date. it seems very obvious on the day of sowing, but at least I am never able to remember after a couple of weeks time. the soilt then needs to be moist but not wet.
After the seedlings have germinated I let them gow in their container until the first real leaf shows, the first two leaves are the seed leaves and look different. I put a few holes into the milk cartons, so seedlings don´t get waterlogged and fill the carton with light compost. then my free diy plant containers are ready to go. 
in the picture I was transplanting fennel seeds. but some plants don´t handle transplanting very well (i.e. parsley). they can be sown directly into the container with several seeds. i just pull the extra ones out, once they have germinated.
you can see how tightly the containers line up. we are also lucky and have some double windows, were the cartons fit just in between. plants that need a lot of space like tomatoe seedlings make good use of the entire lenght of the cartons. I will be able to plant them out with well developed deep roots from the start. for smaller plants I just cut the cartons in half.  this is how every single window sill in the house is going to look until the middle of may, when the last seedlings can move outside. I think it is pretty.
 after weeks of frost in february spring has finaly arrived. a lot of the plants had actually made it through the relatively mild winter with a few leaves. the severe cold in february has killed all the green off. the roses and raspberries got frost damage and had to be cut back. but now spring has made it and a properly winter bare garden is sprinkled with colourful spring dots.
 the wild crocusses are smaler and not as showy as the fancy big garden varieties. they form amazing carpets that overgrow gardenbeds and pathways likewise and come out a good three weeks earlier than the garden varieties. wild crocusses do particularily well in places that are left undisturbed (not too much digging) like permanent herb beds underneath trees and shrubs etc. it is ever such a joy to have the better part of the garden covered in a sea of blue flowers when everywhere else is bare and boring.
as every year the garden is full of autumn leaves. the neighbours are complaining. people are actually paying money to get rid of the leaves. the last issue of our allotment garden newspaper dedicated an entire page to discussing how the plastic bags for leaf litter collection are not sturdy enough. I like the leaves and think they are generally really useful around the garden. the trick is to keep them from getting soggy. in autumn one of our composting spaces is left just for leaves. we rake them up, were they are not wanted and store them airy and dry, ready to go for any of the following uses.
 leaves make an excellent winter cover for your garden beds esp. with shrubs and perennials. you might not even need to rake them up for this.
kitchen waste and fresh lawn clippings are very rich in nitrogen, which makes the compost smelly and soggy. add an equal amount of dry brown leaves every time you are composting any fresh and wet material to avoid these problems. the leaves will compost quickly under these circumstances.
one of my favorite way of using the leaves is preparing manure compost for tomatoes and other greedy plants. in autumn when there is a good supply of leaves we get a few neighbours together and drive to a children’s horse riding place in the outskirts of the city. the horse people give away the horse poo for free and since we don’t have a trailer we transport it back in bin bags. the manure pile gets set up by stacking one layer of manure alternately with one layer of leaves. the layers should not be much thicker than 5cm (2″). the pile can be set up to a hight of 1m-1.40m (3.5-4.5ft). it will shrink quickly in the following weeks. the compost gets used the following may, when we plant out our potatoes, tomatoes and courgettes.
these composting techniques work for leaf litter of most deciduous trees. exceptions are for example walnut leaves and the leaves of evergreen trees. plants made an extra effort here to protect their leaves by making them hard to digest for herbivores and microorganisms – they might take a long time to break down. mix small quantities with other easier to compost material.
