how to keep slugs under control

I find this method very useful to give delicate seedlings a head start and a chance to grow big enough to tolerate a bit of slug nibbling. It is  easy; simply smooth the soil around the seedlings (slugs love to hide under lumps of soil) and sprinkle a not to thin layer of crunched up eggshells around the base of the plant.

lamb´s lettuce sprinkled with egg shells

the eggshells need to be rinsed out (egg yolk takes forever to dry and might smell) and dried thoroughly. I dry them on the heater or in the oven after baking. in summer air drying woks fine. 
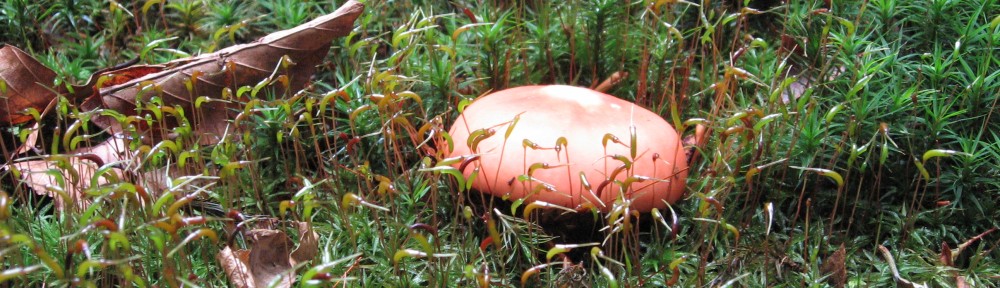
when dry, chrunch the shells up and store them in an airtight container. properly dry eggshells will break forming realy sharp edges. slugs avoid crawling over the shells, it is like crawling on glass. I collect the egg shells all winter as I need a lot of them in spring. idealy get other people to collect them as well to increase the amount. advantages: this method is poison free, good for your soil, worms love egg shells, method works under wet conditions. disadvantage: you need a lot of egg shells, start collecting them early on.

how to grow rainbow chard

chard [Beta vulgaris var. vulgaris] does best in a bed high in organic matter.
distribute a thick layer (5 cm/2” or more) of ripe compost over the garden bed in early spring well before sowing the chard. remove germinating weeds by raking the bed every week or so.
chard seeds do not like cold and damp soil. start sowing when the soil has reached a minimum of 10°C (50F). in berlin this is usually the case in the middle of april.
seeds planted out in cold soil will be germinating later than the ones planted out a couple of weeks later when the soil has warmed up enough.
place the seeds 3cm(1”) deep in the soil and space the rows 30 cm (12”) apart.
once the chard has germinated and grown a couple of inches it needs to be thinned out to about 20cm (7”). if there is not enough space the plants stay small, develop only thin stems and are more susceptible to mildew.
depending on the amount of slugs I mulch the chard only very lightly or not at all until the thinning stage. instead I earth the plants up once by drawing the soil from in-between the rows (work very carefully and shallow) toward the stems of the chard. at the end the green parts of the plants stick out of a mound of soil that covers part of the stems. this procedure disturbs germinating weeds and gives the plants a better stance.
once the chard has established it appreciates a layer of straw mulch to keep the ground moist. additionally to the compost I fertilise the chard with nettle tea or nettle – comfrey tea (1part tea-10parts water) two or three times in may and june.

good companion plants are bush beans, cabbage and relatives, carrots, radishes, beetroots and onion. do not plant next to or after spinach.
start harvesting chard after 2months by only removing a few leaves (including stems) per plant at a time, leaving the heart of the plant intact. chard can be harvested until the first frost in autumn.

praise of rainbow chard

9 reasons why I love rainbow chard

it is highly attractive – I just love the colours.

it is easy to grow – see “how to grow chard”

one or two rows of chard feed a lot of people – admittedly there is sometimes too much of it. if you do not like eating it more than once a week 12 plants are enough for a 5 people household

shiny, brightly coloured plants grow vigorously and show of your gardening skills – grow in view of your neighbours for this reason

it is easy to harvest

it is easy to wash – as chard grows a lot higher than spinach, there is a lot less sand involved.

stems can be prepared like asparagus – cut into sticks, and boil in salt water al dente

the green part of the leaves can be prepared like spinach

tasty, yummy, delicious

harvesting colours

late summer is doing more summer than summer. loving it. good haul today with rainbow chard and flowers, beans, courgette, tomatoes and some herbs.

rainbow chard"bright lights" and flowers

I can not believe the bean season is almost over. I did not have enough yet. the green ones are scarlet runner beans. some people grow them on their fences as screens and don´t bother eating the beans. strange because they are even sweeter than the normal runner beans. the purple variety we got from an organic seed catalog. reliable, hardy, good taste, steady crop. pity they lose their purple colour when cooked.

september harvest

growing tomatoes in our unpredictable climate outdoors is a challenge most years. the rainy summer had them suffering heavily from blight. we always grow 5 or more varieties. some deal better with cold, some are excellent when there is a lot of sun and do not mind if it gets a bit dryer. with a mix of different varieties we usually get a good crop no matter what the weather is like. the yellow ones are called “schönhagener frühe”. me an my friend were a bit surprised because we remembered them to be red… won´t complain though. tasty and as the name suggests very early.

how to make a new gardenbed

 if new strawberry runners are planted in august, you get a full crop the following year. these ones have taken root nicely and are doing well. I used dried willow branches from last winter to make a little fence around the bed. it keeps the straw in and looks quite cute. I like it.
the soil in the old garden bed along the fence has been dreadful ever since we had the garden. it was pure sand which actually repelled water. so we decided to go the whole hog and completely renew the entire bed. we have used the following method successfully for several other garden beds as well.

step one
dig a hole as big as your new garden bed. it can be anything from 40-80 cm (15.7-31.4”)deep. deeper is possible but a lot more work and not really necessary. we spread the old soil across some paths and underneath some shrubs that did not mind a bit of extra sand. if your soil is too heavy for massive digging, consider a high rise bed and apply the following steps to the top soil. since we have easy to dig sandy soil, which has a tendency to dry out too quickly, we prefer flat garden beds.

step two
add a generous layer of coarse material: hedge cuttings, tree branches not much wider than a pencil, woody flower stalks etc. this layer will rot slowly and provide good drainage for the new garden bed. there is no need to build the new bed in a day. you can for example fill up the new garden bed over the course of several weeks in autumn, when there is a huge amount of material to get rid of anyway. if you are making a high rise bed on top of your old garden bed, consider placing a layer of well soaked, thick cardboard underneath this layer of coarse material to keep the weeds down.

step three
add a good mix of composting material:
lawn clippings – mix well with other stuff,
dead leaves,
rotten fruit – cover these well with some other material,
household compost – no meat, no cooked food to avoid a rat problem,
non flowering weeds,
animal manure – we use stuff from a children’s horse riding place in the city, they are giving it away for free,
anything you can find, and you and or your neighbours need to get rid of.
add as many different things as possible, general composting rules apply. you can build up this heap quite a bit higher than you want it to be in the end. it will shrink considerably as the material decomposes.

step four
once you filled up the hole, cover it with a good layer of compost that is not ready yet from your compost bin. the compost covers the bed and keeps it moist and dark, prevents smells and flies and will enable you to use the bed quicker than otherwise, because the top layer will be ready for planting quicker this way.
for the strawberry garden bed on the picture we added composted horse manure and not quite ripe compost directly on to the first coarse layer. as a result the new bed was ready to plant quickly in a few weeks time.

step five
cover the new bed with straw or wet cardboard and wait until millions of soil organisms have transformed the compost heap into your new most productive garden bed. if you build the new bed in early autumn it will be ready to plant in late spring. in our area there is no composting activity between november and february. the bed would be ready here by middle of may. plant things that do not mind fresh compost and like a lot of nutrients.

late summer paradise

the summer flowers are still out and about and the autumn flowers are already starting. this time of the year is just amazing. I was never that interested in flowers (you can not eat them) until I got my own garden. the first year they were just popping up everywhere. every time I went to the garden, there was something growing I had not seen before.now it is one of the greatest luxuries to have a different bunch of flowers every week for most of the year. it comes as a bonus that this simple pleasure dos not involve pesticides, child labour and transport half way across the world.

our neighbour tells us that this rose variety was bred by the former owner of the garden. I quite like them. there are a lot of flowers in june. if you cut them back they will after a short break flower until the first frost.

Callistephus chinensis these guys seem to have signed a contract to only ever grow in the middle of vegetable beds or on the pathways. a well, they come up by themselves, require no work and are absolutely gorgeous.

native to central america dahlia are very sensitive to frost. in winter I keep the bulbs in our frost-free cellar. as an experiment I started them indoors in april this year. by the time the possibility of a late frost was over, (middle of may here) the plant had grown a meter tall. it was somewhat challenging to transport it to the garden in my bicycle panniers. I will leave it a bit later next year.

gardening behind the wall


our allotment is part of a garden association which consists of 80 something allotments on the east side, right beside the former berlin wall. during GDR times only registered garden owners could go so close to the wall, people weren’t actually allowed to bring guests. due to a general shortage of building material all sorts of materials got used for garden sheds, fencing and other structures. the supposedly reliable people who were allowed so close to the wall were still “organising” their building materials anyway they could. our fence has to this day one original concrete wall-fence-post, so has our compost. I love the way material is recycled efficiently and creatively.